 Save
Save My daughter saw a vintage Betty Boop poster at a flea market and wouldn't stop talking about those big round eyes and glossy black hair. When her birthday rolled around, I knew exactly what cake to attempt. The kitchen smelled like vanilla and butter for hours, and I may have panicked twice while shaping fondant hair, but her face when she saw it made every wobbly detail worth it.
I made this for a retro-themed party where half the guests had no idea who Betty Boop was, and the other half lit up like kids. One friend kept photographing the cake from every angle before we cut into it. The red layers against that glossy black fondant hair felt like edible art, and I caught myself grinning every time someone asked how I shaped those curves.
Ingredients
- All-purpose flour: Forms the structure of the cake and keeps the crumb tender when measured correctly, never packed.
- Granulated sugar: Sweetens and helps create a light, fluffy texture when creamed with butter.
- Baking powder: Gives the layers their rise and airy texture, so make sure it's fresh.
- Salt: Balances sweetness and enhances all the other flavors in the batter.
- Unsalted butter (for cake): Adds richness and moisture, and room temperature butter creams smoothly without lumps.
- Large eggs: Bind the batter and add structure, and room temperature eggs mix in more evenly.
- Whole milk: Contributes moisture and a soft crumb, and you can substitute buttermilk for extra tang.
- Vanilla extract: Deepens flavor and makes the whole kitchen smell like a bakery.
- Red gel food coloring: Creates that signature deep red hue, and gel works better than liquid for vibrant color without thinning the batter.
- Cream cheese: The secret to tangy, creamy frosting that's not cloyingly sweet.
- Unsalted butter (for buttercream): Whips into the cream cheese for a silky, spreadable consistency.
- Powdered sugar: Sweetens and thickens the buttercream, and sifting prevents gritty lumps.
- Black fondant: Shapes Betty's iconic hair silhouette with a glossy, smooth finish.
- White fondant: Forms her big round eyes and little heart-shaped highlights.
- Red fondant: Creates her bold lips and optional headband accent.
- Edible pearl dust: Adds a subtle shimmer to fondant details for extra charm.
- Cornstarch: Keeps fondant from sticking to your work surface when rolling.
Tired of Takeout? 🥡
Get 10 meals you can make faster than delivery arrives. Seriously.
One email. No spam. Unsubscribe anytime.
Instructions
- Prep the pans:
- Preheat your oven to 350°F and grease two 8-inch round pans, then line the bottoms with parchment paper so the cakes release cleanly. This step saves so much frustration later.
- Mix the dry ingredients:
- Whisk together flour, baking powder, and salt in a medium bowl until evenly combined. Set it aside while you work on the wet ingredients.
- Cream butter and sugar:
- Beat butter and sugar on medium speed for about three minutes until the mixture looks pale and fluffy. This step traps air and creates a lighter crumb.
- Add eggs and vanilla:
- Beat in eggs one at a time, making sure each is fully incorporated before adding the next. Stir in vanilla extract until the batter smells amazing.
- Alternate wet and dry:
- On low speed, add the flour mixture and milk in three additions, starting and ending with flour. Scrape down the bowl so nothing gets left behind.
- Color the batter:
- Mix in red gel food coloring until the batter turns a deep, uniform red. Don't be shy with the gel, the color will lighten slightly as it bakes.
- Fill the pans:
- Divide the batter evenly between the two prepared pans and smooth the tops with a spatula. This helps them bake level.
- Bake:
- Bake for 25 to 30 minutes, rotating the pans halfway through for even heat. A toothpick inserted in the center should come out clean.
- Cool the cakes:
- Let the cakes rest in the pans for ten minutes, then turn them out onto wire racks to cool completely. Frosting warm cake leads to melty disasters.
- Make the buttercream:
- Beat cream cheese and butter together on medium speed until smooth and creamy, about two minutes. Gradually add powdered sugar one cup at a time, then increase speed and beat until light and fluffy.
- Level and stack:
- Trim the domed tops of the cakes with a serrated knife so they sit flat. Spread buttercream on the first layer, then place the second layer on top.
- Crumb coat:
- Apply a thin layer of buttercream all over the cake to seal in crumbs. Chill in the fridge for 20 minutes until the frosting sets firm.
- Final frosting:
- Spread a final coat of buttercream over the chilled cake, smoothing the sides and top with a scraper or offset spatula. Take your time, smooth frosting makes fondant placement easier.
- Roll black fondant:
- Dust your work surface with cornstarch and roll black fondant to about 1/8-inch thickness. Cut out Betty's hair silhouette using a template or freehand, then transfer it onto parchment.
- Cut white and red fondant:
- Roll white fondant and cut out two large circles for eyes plus small hearts for highlights. Roll red fondant and cut out lips, then dust with edible pearl dust if you like a little shimmer.
- Attach fondant hair:
- Once the frosting is firm, gently drape the black fondant hair over the front of the cake, trimming any excess at the base. Use a small dab of buttercream to stick the white eyes and red lips in place.
- Add details:
- Use extra black fondant to cut out eyelashes and eyebrows, positioning them around the eyes. Roll a thin coil of red fondant into a headband and place it across the top edge of the hair if desired.
- Final touches:
- Add a small sugar flower or edible sparkles around the base if you want extra flair. Let the decorated cake rest at room temperature for 30 minutes before slicing.
 Save
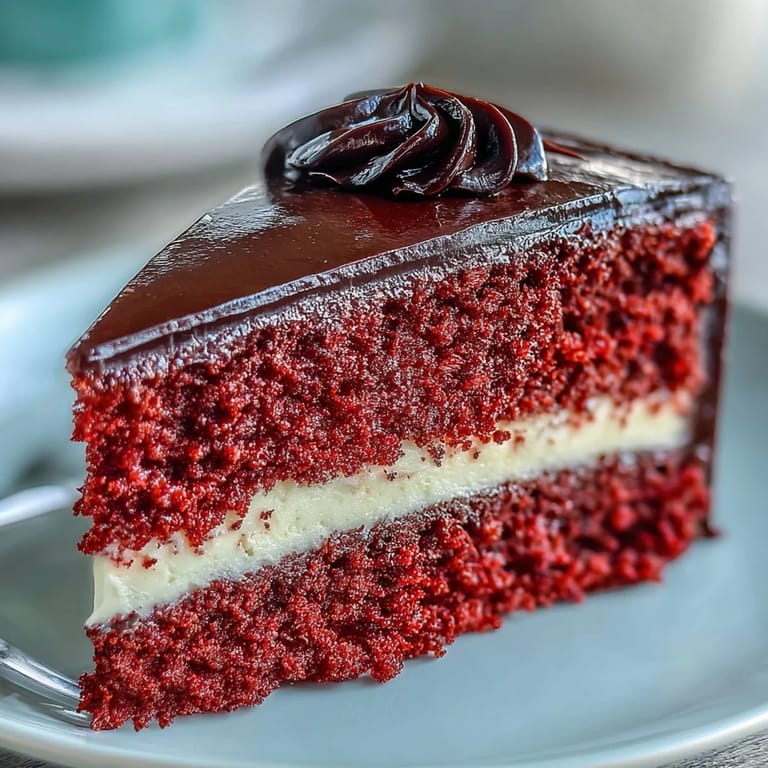
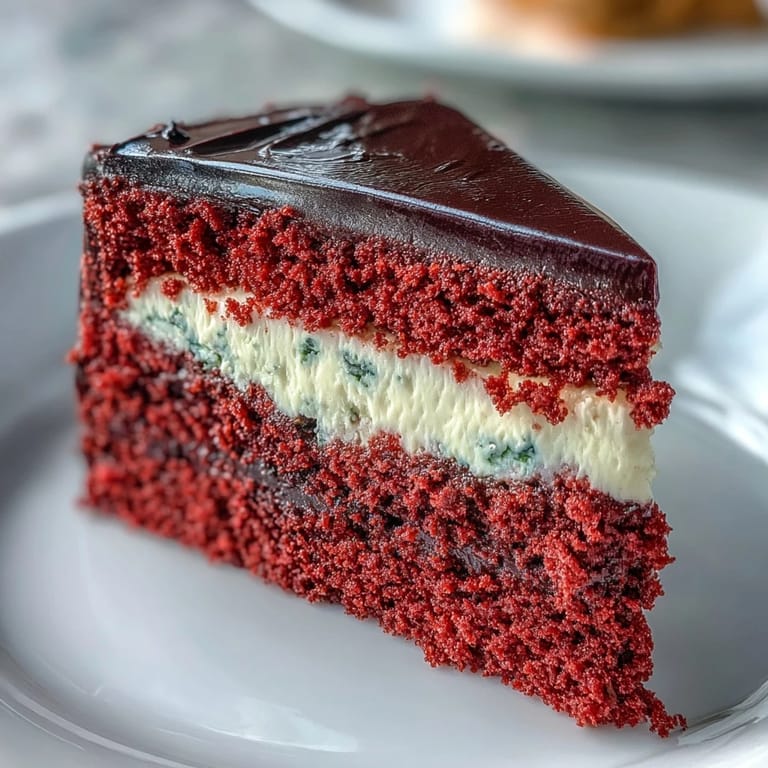
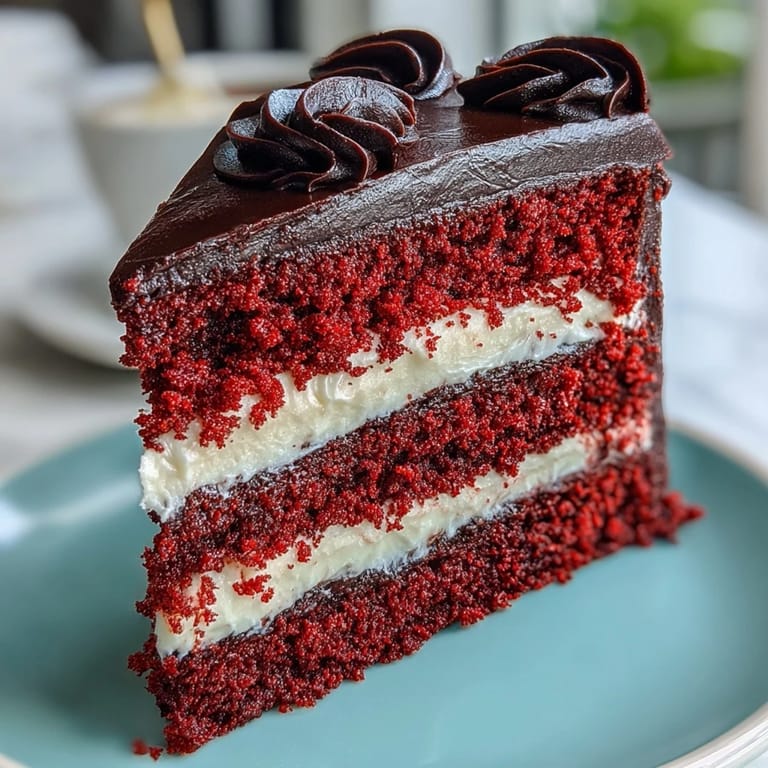
Save The first slice revealed those bright red layers against the creamy white frosting, and everyone got quiet for a second before diving in. My daughter kept the fondant eyes on her plate like a trophy. That cake became a family story we still laugh about, proof that a little cartoon nostalgia and a lot of buttercream can turn a regular Saturday into something memorable.
How to Get Clean Cake Layers
Trimming the domed tops with a serrated knife sounds scary, but it's the key to a stable, professional-looking stack. I chill the cakes for about 15 minutes before leveling so they're firm and less likely to crumble. A long, slow sawing motion works better than pressing down hard, and saving those scraps for snacking is a baker's perk.
Working with Fondant for the First Time
Fondant intimidated me until I realized it's just edible playdough that needs a light touch. Kneading it for a minute warms it up and makes it pliable, and a thin dusting of cornstarch prevents sticking without drying it out. If you mess up a cut, just ball it up and re-roll, fondant is forgiving as long as you don't overwork it.
Storage and Make-Ahead Tips
I bake the cake layers a day ahead, wrap them tightly in plastic wrap, and store them at room temperature so they stay moist. The buttercream can be made up to three days in advance and kept in the fridge, just let it come to room temperature and re-whip before using. Fondant decorations hold up beautifully when stored in an airtight container away from humidity, and assembling the cake the morning of your event gives the frosting time to set without the fondant sweating.
- Wrapped cake layers stay fresh for up to two days at room temperature.
- Finished cake keeps in the fridge for up to four days, but let it sit out for 30 minutes before serving so the buttercream softens.
- Fondant decorations can be made a week ahead and stored in a cool, dry place.
 Save
Save This cake takes time and a little courage, but the smiles it brings are worth every minute spent rolling fondant and smoothing frosting. Betty Boop would approve of the effort, and so will anyone lucky enough to get a slice.
Recipe FAQs
- → How far in advance can I prepare the fondant decorations?
You can create the fondant hair, eyes, lips, and other decorative elements up to 24 hours ahead. Store them flat in an airtight container at room temperature, separated by parchment paper to prevent sticking. Avoid refrigerating fondant as moisture can make it sticky and difficult to work with.
- → Can I make the red velvet layers a day before decorating?
Absolutely. Bake the layers, let them cool completely, then wrap tightly in plastic wrap and store at room temperature for up to 24 hours. For longer storage, refrigerate for up to 3 days or freeze for up to 3 months. Bring chilled cakes to room temperature before frosting to prevent condensation from affecting the buttercream.
- → What's the best way to achieve deep red color without using too much food coloring?
Use gel food coloring rather than liquid—gels are more concentrated and won't thin your batter. Start with a small amount and add gradually, remembering that the color often deepens slightly during baking. For naturally reddish tones, you can add 1 tablespoon of cocoa powder, though this will create a more subtle red than traditional bright red velvet.
- → How do I prevent the fondant from sagging or falling off the cake?
Ensure your buttercream is chilled and firm before applying fondant decorations. For larger pieces like the hair silhouette, consider inserting toothpicks or small pieces of spaghetti for support. If the room is warm, work quickly and keep the cake chilled until serving time. Humidity can soften fondant, so aim for a cool, dry environment when decorating.
- → Can I substitute the cream cheese buttercream with another frosting?
Yes, Swiss meringue buttercream makes an excellent alternative—its silky texture and subtle sweetness complement the red velvet beautifully while providing greater stability in warm conditions. Traditional American buttercream also works well. Just keep in mind that cream cheese frosting adds a signature tang that balances the sweetness of the cake and fondant.