 Save
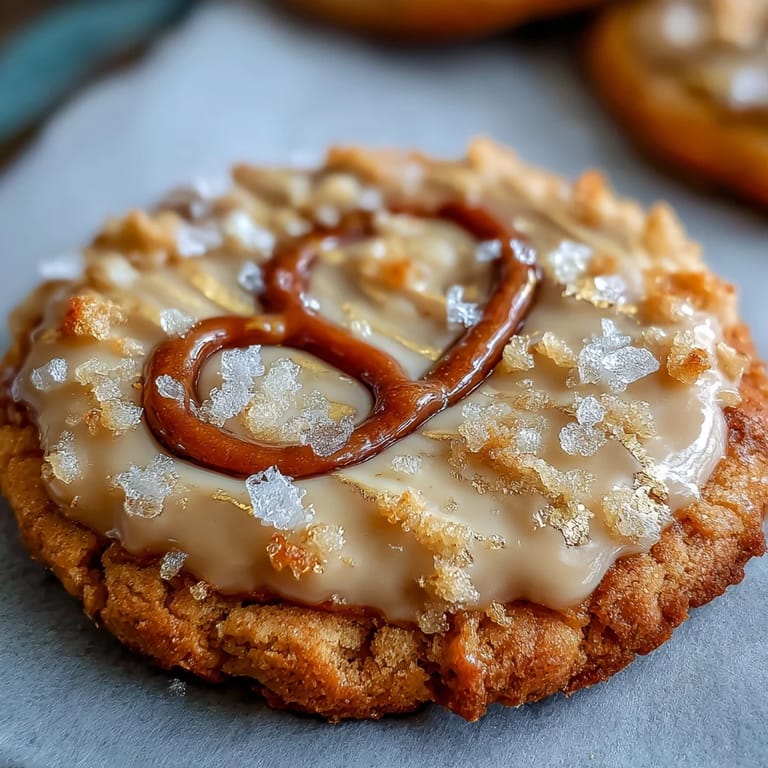
Save Some days, the mood in my kitchen feels almost planetary, and the first time I made these Taurus Zodiac Cookies, the whole room seemed to glow with anticipation. The vanilla and almond scents that wafted through the air were richer than usual, maybe because I kept giggling over an astrological playlist as I mixed the dough. Something about crafting edible stars and horns for friends born under Taurus brought a quiet joy—though when I knocked over the flour midway, the cosmos didn’t rescue me from cleanup duty. Every golden swirl of royal icing seemed to catch the afternoon sun, making the cookies look like treasures. These are treats that practically insist on being admired before the first bite.
The last time I boxed these up, I paired each constellation cookie with a handwritten note for my friend’s astrology club, and the way everyone delicately picked a shape from the box felt like opening fortune cookies. Someone burst out laughing when they realized their sign was decked out in the most dramatic gold, and stories started spilling across the table. The cookies vanished within minutes, but the laughter lingered as golden crumbs glinted on chins and napkins. No birthday cake in sight could have stolen the spotlight from that tray. Impossibly, the cookies were still a centerpiece long after dessert.
Ingredients
- All-purpose flour: This is the backbone of your cookies; sift it for the lightest dough.
- Unsalted butter: Softening it first ensures the sugar creams into clouds and keeps edges crisp.
- Granulated sugar: Measuring this with a light hand keeps the cookies from oversweetening the royal icing.
- Large egg: Best added at room temperature so the dough binds smoothly without splitting.
- Pure vanilla extract: Not just for aroma—trust me, cheap vanilla never hides in a buttery cookie.
- Almond extract (optional): A whisper of this makes the cookies taste like bakery magic, but skip it for nut allergies.
- Salt: Don’t fear this tiny amount—it makes all the difference in flavor balance.
- Powdered sugar: Sift before beating into icing or it’ll turn clumpy and dull the shine.
- Egg whites or meringue powder: Either brings that “magically glossy” texture necessary for detailed designs.
- Lemon juice: Lifts the icing’s sweetness and makes it taste fresher than expected.
- Vanilla extract (for the icing): A small repeat, but its warmth rounds out the icing.
- Edible gold luster dust: Paints with the lightest touch and turns everyday cookies into starry gems—buy a little, it goes far.
- Clear alcohol (vodka or lemon extract): For the gold—it evaporates quickly, leaving just sparkle.
Tired of Takeout? 🥡
Get 10 meals you can make faster than delivery arrives. Seriously.
One email. No spam. Unsubscribe anytime.
Instructions
- Cream Butter and Sugar:
- Beat softened butter with sugar in a big bowl until it’s pale and looks like frosting, and listen for the change in sound as it fluffs up.
- Add Egg and Flavors:
- Mix in the egg, vanilla, and almond extract; the aroma will hit you right away, and you’ll know it’s ready when it all looks silky.
- Combine Dry Ingredients:
- In another bowl, whisk flour and salt together, then gently fold these into your wet mixture so the dough just comes together and doesn’t turn tough.
- Chill the Dough:
- Divide into two discs, wrap, and chill for at least 30 minutes—use this time to put on music or clean up, but don’t rush it or the dough will stick when rolling.
- Shape and Cut:
- Roll the dough on a floured counter to about a quarter-inch thick, using Taurus or zodiac cutters for a fun theme, and don’t forget to gently gather scraps for re-rolling.
- Bake:
- Space cookies on parchment-lined sheets and bake at 350°F for 10–12 minutes, just until the edges go golden and the kitchen smells glorious.
- Cool and Get Ready to Decorate:
- Let the cookies cool completely on racks, resisting the urge to nibble, so your icing stays smooth.
- Make Royal Icing:
- Whip egg whites or meringue powder with water until soft peaks form, then beat in sifted powdered sugar, lemon juice, and a hint of vanilla until it’s beautifully glossy.
- Color, Fill, and Set:
- Divide the icing for colors if you’d like, fill piping bags, and outline and flood your cookies; then let them set for a couple hours or the gold won’t stick.
- Gold Details:
- Mix gold luster dust with a splash of clear alcohol to make paint, and brush on Taurus symbols, little constellations, or shimmering lines once the icing is dry.
- Box and Gift:
- Arrange finished cookies on parchment in a pretty box, sneak in a Taurus card if you have one, and brace yourself for gleeful reactions.
 Save
Save 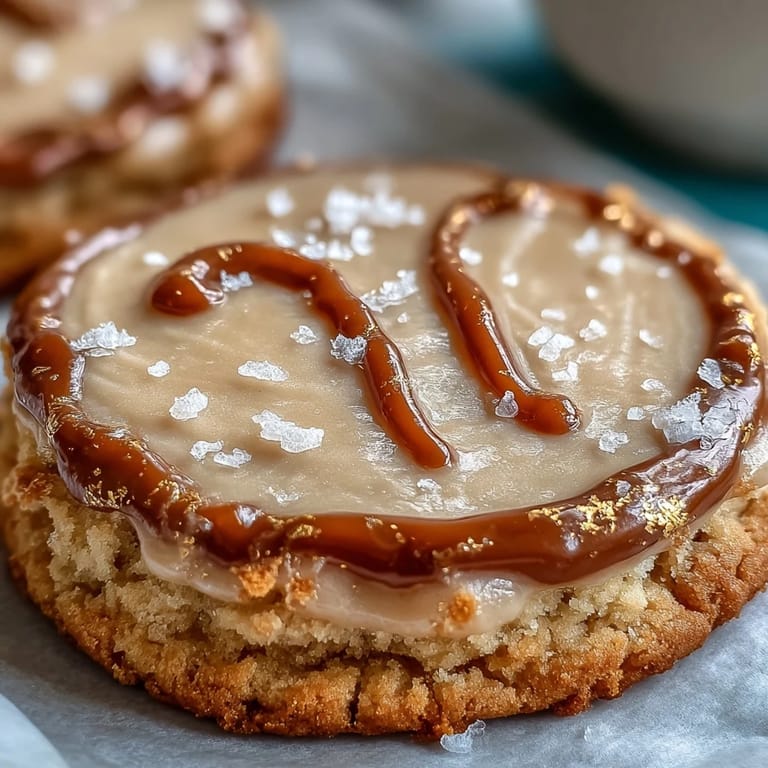 Save
Save There was one evening when my younger cousin, notebook in hand, sat nearby attempting to draw everyone’s birth sign as I iced cookies. She was so focused she dipped her elbow in a swirl of gold icing, and we both ended up laughing too hard to care. That batch of cookies became more than a treat—they were conversation starters, messy masterpieces, and bite-sized memory-makers passed around a family table filled with joy.
Decorating Secrets for Showstopper Cookies
The trickiest part isn’t the cookie dough, but learning to be bold with your gold. Thin paint gives a delicate shimmer, while a thicker mix makes dazzling accents that truly pop—try both to see what you love. If you outline the Taurus glyphs with a steady hand, resist the urge to rush, since even a tiny wobble looks radiant when intentional. Green and pink gel colors celebrate the earthy side of Taurus, and you can dust a few cookies with just a faint brush of gold for variety. Decorating cookies with friends or kids reminds me that imperfection is the real charm in homemade treats.
Flavor Swaps and Playful Variations
If you’re new to royal icing, don’t fret—swap almond extract for citrus zest or rosewater and see how the aroma changes everything. Vegan swaps are impressively simple: vegan butter and aquafaba whip up a dough that’s just as sturdy and rich. Adding matcha powder or beetroot to a portion of the icing brings an extra layer of Taurus-inspired color, and kids love painting edible sparkles. These cookies are a blank canvas for flavor experiments or a host of zodiac themes. The only limit is your own imagination and perhaps the size of your cookie box.
Boxing, Gifting, and Serving Suggestions
Assembling your Taurus zodiac box is where things get really fun—nestle the cookies with parchment and tuck in a card explaining their celestial connection. I sometimes add a little sachet of chamomile flower for extra calm, or line the box with dried rose petals for a heady scent when opened. Serve these alongside a pot of calming tea after a stargazing evening, or gift them with a ribbon on a friend’s astrology birthday. There’s something quietly magical about giving a treat that feels both thoughtful and gleamingly festive.
- Store leftovers in a cool, airtight container to keep that royal icing crisp.
- If you want super-sharp shapes, let the cutter do the work and avoid twisting.
- Patience is key—let every layer dry thoroughly for best results.
 Save
Save  Save
Save I hope making and sharing these Taurus Zodiac Cookies leaves you with golden hands and a happy heart. Sometimes, a cookie box really can be a wish for luck and sparkle.
Recipe FAQs
- → How long should the dough be chilled?
Chill dough for at least 30 minutes to firm it up; longer resting (up to 2 hours) helps prevent spreading and makes rolling and cutting cleaner.
- → How do I get smooth flooded icing?
Thin royal icing to flooding consistency and outline first to create a dam. Flood gently, use a toothpick to nudge air bubbles, and allow at least 2 hours to set before adding details.
- → What is the best way to apply edible gold?
Mix gold luster dust with a few drops of clear alcohol or lemon extract to make a paint. Use a fine brush to add accents once the icing is fully dry to avoid smudging.
- → Can I swap extracts for different flavors?
Yes. Replace almond extract with citrus zest or a splash of lemon extract for a brighter note; adjust quantities to taste to keep the dough balanced.
- → How do I keep shapes sharp while baking?
Roll to an even 1/4-inch thickness, chill cut cookies briefly on the sheet before baking, and remove when edges are just set and slightly golden to preserve crisp outlines.
- → Any tips for assembling the gift box?
Layer cookies with parchment or tissue, use separators for delicate pieces, and add a themed card. Let all decorations dry thoroughly to prevent smearing in transit.