Save
Save My cousin called me three weeks before her graduation asking if I could bake her celebration cake, and I immediately thought of something bold and memorable. She mentioned wanting her school colors to shine through in layers, so I set out to create an ombre cake that would actually look as impressive as it tasted. The idea of watching those gradient shades emerge as I mixed the batter felt like the perfect way to mark such a big moment, and honestly, I was nervous but excited to pull it off.
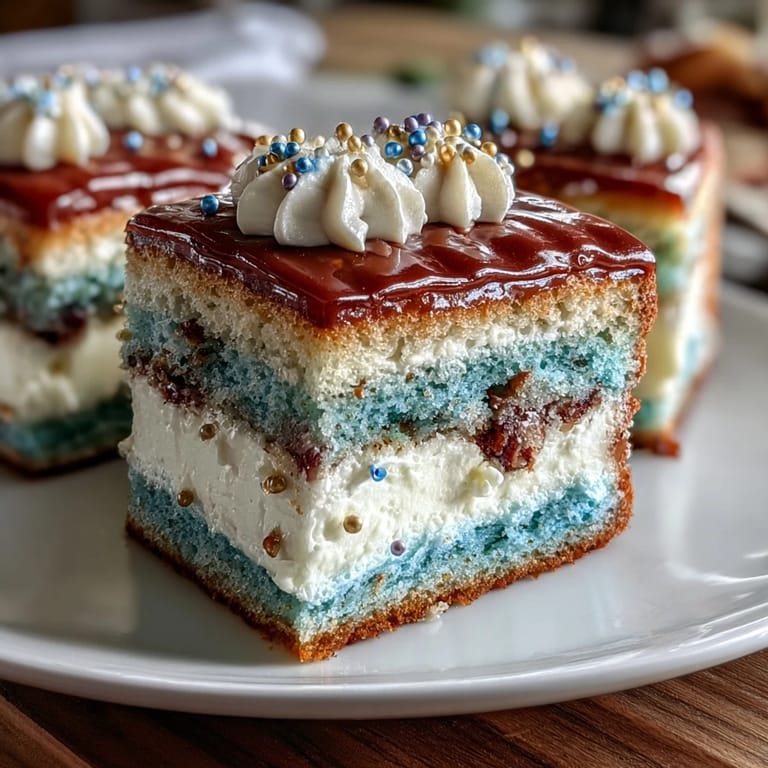
When I pulled those four layers out of the oven and they cooled just right, I lined them up on the counter and the color gradient took my breath away. My cousin walked into the kitchen mid-frosting and actually gasped, which made all the careful layering and color-matching feel completely worth it. That's when I realized this wasn't just a cake—it was a keepsake of a day she'd remember forever.
Ingredients
- All-purpose flour: Gives you a tender, dependable crumb that won't overshadow your beautiful colors.
- Baking powder: Creates gentle lift so your layers stay light and fluffy instead of dense.
- Unsalted butter: Use softened butter so you can cream it properly; cold butter won't incorporate enough air.
- Granulated sugar: Dissolves completely and helps create that fluffy texture that makes every bite feel special.
- Room temperature eggs: This matters more than you'd think—cold eggs won't emulsify smoothly and can make your batter lumpy.
- Vanilla extract: A full tablespoon gives the cake warmth without making it taste perfume-y.
- Whole milk at room temperature: Cold milk can seize the batter, so let it sit on the counter while you prep everything else.
- Gel food coloring: Don't use liquid coloring; gel gives you vivid, true tones without thinning your batter or making the cake taste metallic.
- Egg whites for buttercream: These need to be impeccably clean—even a speck of yolk will prevent them from whipping properly.
- Unsalted butter for frosting: Softened to room temperature and cut into cubes so it blends smoothly into the meringue.
Tired of Takeout? 🥡
Get 10 meals you can make faster than delivery arrives. Seriously.
One email. No spam. Unsubscribe anytime.
Instructions
- Set yourself up for success:
- Preheat your oven to 350°F and grease all four pans generously, then line them with parchment paper so your layers release cleanly. Having everything prepped and your oven ready means you won't be caught off guard when the batter is mixed.
- Make your dry mix:
- Whisk flour, baking powder, and salt together in a medium bowl and set aside. This distributes the leavening evenly so you get consistent rise across all four layers.
- Cream your butter and sugar:
- Beat softened butter and sugar in a large bowl until it's pale, fluffy, and looks almost like frosting itself—this usually takes 3 to 4 minutes. This aeration is what makes your cake tender instead of heavy.
- Add eggs one at a time:
- Drop each egg in individually and beat well after each addition so it fully incorporates before the next one goes in. Rushing this step leads to a grainy batter and uneven crumb.
- Mix in your vanilla:
- Add the vanilla extract and give it a good stir to distribute the flavor throughout.
- Alternate flour and milk:
- Add about one-third of your dry mixture, then half the milk, then another third of flour, then the remaining milk, then the last bit of flour. Scrape the bowl between each addition and mix just until combined—overmixing develops gluten and makes the cake tough.
- Divide and color your batter:
- Split the batter evenly among four bowls and add increasing amounts of gel coloring to each one, starting with the lightest shade in the first bowl and building to the darkest in the fourth. The gradient should feel intentional, like you're watching a sunset transition across sky.
- Pour and bake:
- Pour each colored batter into its prepared pan and smooth the tops gently with an offset spatula. Bake for 22 to 25 minutes until a toothpick inserted in the center comes out clean—don't overbake or your layers will be dry.
- Cool your layers:
- Let them rest in the pans for 10 minutes so they firm up enough to handle, then turn them out onto wire racks to cool completely. This takes patience, but rushing it while they're warm will cause them to crack or crumble.
- Make your meringue base:
- Combine egg whites and sugar in a heatproof bowl and set it over a pot of gently simmering water, whisking constantly until the sugar dissolves and the mixture reaches 160°F. You want it to feel warm, smooth, and free of any gritty sugar crystals.
- Whip until fluffy:
- Transfer the mixture to a stand mixer and whip on high speed for about 10 minutes until stiff peaks form and it's completely cool. The mixture should look glossy and thick, like soft serve ice cream.
- Add your butter slowly:
- Add softened butter a few cubes at a time, beating well between additions so it emulsifies smoothly into the meringue. If it looks curdled at first, keep mixing—it will come together into silky frosting.
- Season and color:
- Mix in your vanilla extract and divide the buttercream into portions if you want to create an ombre frosting effect to match your layers. Tint each portion with gel coloring to your desired shade.
- Build your cake:
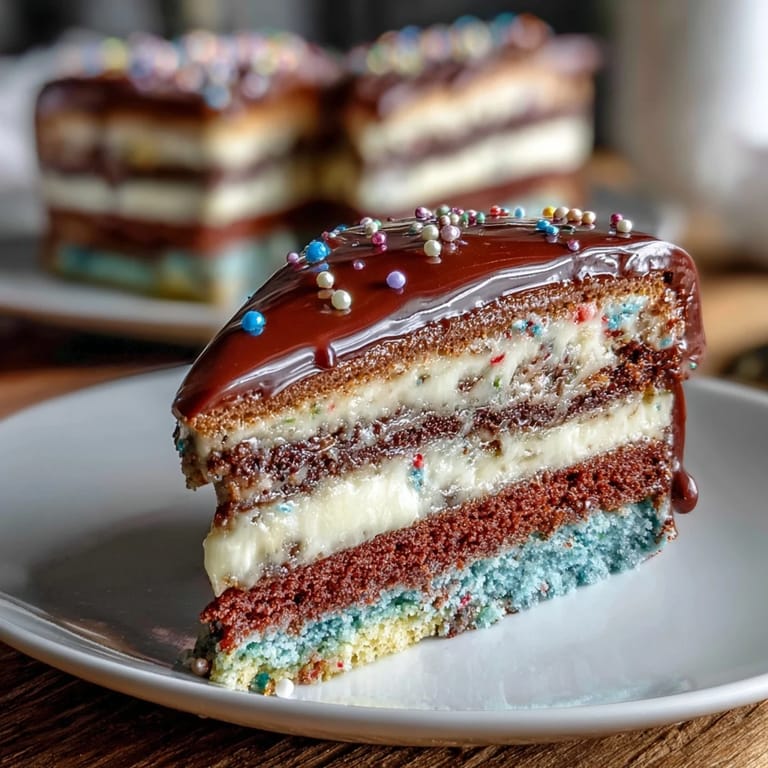
- Place your darkest cake layer on a cake stand and spread a generous layer of buttercream on top, then repeat with the remaining layers in order from darkest to lightest. This creates a beautiful color gradient when you cut into it.
- Apply your crumb coat:
- Spread a thin, even layer of buttercream over the entire cake to seal in any crumbs and create a smooth base for your final frosting. Chill this for 20 minutes so it sets.
- Frost and finish:
- Apply your final layer of buttercream, blending the colored portions together to create an ombre effect down the sides if desired. Decorate with edible pearls, a graduation topper, or piped details in contrasting colors.
- Chill and serve:
- Refrigerate the finished cake until the frosting is set, then bring it to room temperature for about 30 minutes before slicing and serving. The flavors will taste richer and the texture will be perfect.
 Save
Save Watching my cousin blow out her candles and cut into that cake, seeing the color layers emerge perfectly, felt like I'd baked more than just dessert. The ombre didn't just look beautiful—it told a story about her transition from high school to whatever comes next, each shade representing a different chapter.
Choosing Your Ombre Colors
School colors are the obvious choice, but I've also seen this cake done in sunset gradients, ocean blues that fade to white, or even a rainbow progression. Think about the lighting where the cake will be displayed—natural light will show off jewel tones differently than indoor lighting, so if possible, do a small color test on a plate to see how it translates. The beauty of gel coloring is that you can adjust as you go, adding more drops if you want the gradient more dramatic or pulling back if you prefer subtle transitions.
Making Buttercream Less Intimidating
Swiss meringue buttercream sounds fancy and complicated, but it's actually more forgiving than American buttercream because the heat pasteurizes the eggs and the meringue base is so stable. The key is not rushing the whipping phase—give it the full 10 minutes even if it feels like it's taking forever, because that's what creates the silky texture. If you're nervous, practice the technique once with a smaller batch just for the crumb coat, and save the colored batches for when you feel confident.
Storage and Make-Ahead Magic
You can bake the layers up to two days ahead and store them wrapped in plastic wrap at room temperature, which takes pressure off on the day of celebration. The buttercream can be made the morning of and kept at room temperature if your kitchen is cool, or refrigerated and brought back to spreadable texture just before assembly. If you assemble the cake ahead, refrigerate it and let it come to room temperature before serving for the best flavor and texture.
- Wrapped layers stay fresh and actually become easier to trim and frost after sitting overnight.
- Buttercream that's been refrigerated can be softened by letting it sit on the counter for 20 minutes or gently warming the bowl over warm water while stirring.
- This cake is best served the same day it's frosted, as the frosting holds up beautifully and tastes richest at room temperature.
 Save
Save This cake has a way of becoming the thing people remember about a celebration, not just the dessert served at it. Every time you make it, you're creating something that marks a moment in someone's life.
Recipe FAQs
- → How can I achieve the perfect ombre color gradient?
Divide the batter evenly and gradually increase gel food coloring in each portion to create a smooth color transition. Gel coloring ensures vibrant, consistent hues.
- → What is the best way to make silky smooth buttercream?
Whisk egg whites and sugar over simmering water until warm, then whip until stiff peaks form. Gradually add softened butter and vanilla, whipping until silky.
- → Can I prepare the layers in advance?
Yes, bake the layers ahead and store them wrapped in plastic wrap at room temperature or refrigerated. Bring them to room temperature before assembling.
- → How do I prevent crumbs from mixing into the final coating?
Apply a thin crumb coat of buttercream and chill the cake before adding the final frosting layer for a smooth finish.
- → What decorations complement this cake style?
Edible gold or silver pearls, themed toppers like caps or diplomas, and piped buttercream accents enhance the celebratory look.